 By Miles Sinclair
Updated November 2026
The best coffee for pour over is a fresh, medium-light roast with bright, clearly defined flavors, ground to a medium-fine size and brewed at a ratio near 1:16. Get those three variables right and a pour-over will taste clean, sweet and layered instead of flat or bitter. This guide walks through how to pick beans and set up your brew.
Choose the Right Roast and Origin
Pour-over rewards coffees that show off their origin character. Light to medium-light roasts tend to keep the acidity, fruit and floral notes that pour-over highlights, while very dark roasts often taste heavy and smoky through this method. Look for bags that list a roast date, a single origin or a clear blend, and tasting notes such as citrus, stone fruit, cocoa or caramel. Beans are at their best roughly two to four weeks after roasting, so a recent roast date matters more than a long shelf life.
Shopping for one? See our guide: 7 Best Pour Over Coffee Dripper Models for Home Brewers (2026).
Dial In the Grind, Ratio and Water
Three settings do most of the work in pour-over. Use a medium-fine grind, roughly the texture of table salt, and adjust from there. Start with a ratio of about 1:16, meaning 16 grams of water for every gram of coffee. For a single 12-ounce mug, that is roughly 20 grams of coffee and 320 grams of water. Keep the water between 200°F and 205°F, which is just off a full boil.
Basic steps
- Weigh 20 grams of coffee and grind it to a medium-fine size.
- Rinse a paper filter with hot water to remove papery taste and preheat the brewer and mug.
- Add the grounds, level the bed and place the brewer on your mug or carafe.
- Bloom: pour about 40 grams of water evenly over the grounds and wait 30 seconds.
- Pour the rest in slow, steady circles, reaching about 320 grams total by 2:30 to 3:00.
- Let the water drain fully, then remove the brewer and taste.
Pick Your Tools and Supplies
You do not need much to brew well, but a few items make consistency easier. A gooseneck kettle gives you control over flow, a scale lets you repeat the same ratio every time, and a burr grinder produces an even grind. Pour-over-specific paper filters fit cone brewers tightly and prevent channeling, so use the filters made for your dripper.
Common Mistakes
- Using stale beans. Coffee loses aromatics quickly after roasting, so buy smaller bags.
- Grinding too fine, which slows the drain and tastes bitter. Coarsen the grind in small steps.
- Using boiling water, which over-extracts and pulls out harsh flavors.
- Pouring unevenly or too fast, which leaves dry pockets of grounds.
- Skipping the scale. Eyeballing dose and water makes it hard to know what changed.
Recommended Gear
- Gooseneck kettle: a narrow spout lets you pour slowly and precisely over the grounds. View on Amazon
- Digital kitchen scale: it tracks coffee and water in grams so your ratio stays the same. View on Amazon
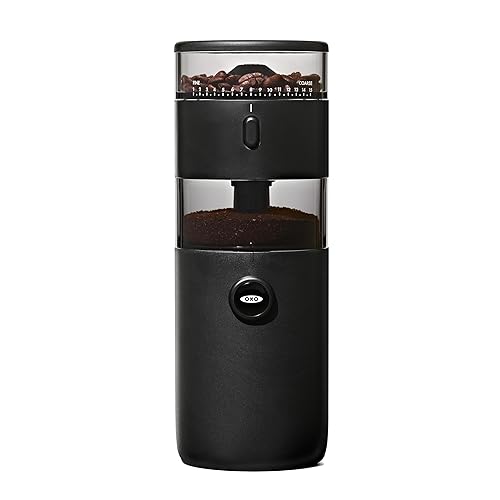
- Burr grinder: it produces a more even grind than blade models, which improves clarity and sweetness. View on Amazon
For more on dialing in your cup, see Pour Over Coffee Grind: A Step-by-Step Guide for Better Flavor and Water Temperature for Pour Over Coffee: 200–205°F for Balanced Flavor. If your cups taste harsh, Why Is My Pour Over Coffee Bitter: 5 Causes and Fixes for a Smoother Cup covers the most common fixes.
FAQ
What roast is best for pour over coffee?
Light to medium-light roasts usually work best because they keep the bright acidity and fruit notes that pour-over highlights. Darker roasts can taste heavy or ashy through this method.
How fresh should coffee be for pour over?
Most beans taste best roughly two to four weeks after roasting. Check the roast date on the bag and buy in amounts you can use within a month.
Can I use pre-ground coffee for pour over?
You can, but pre-ground coffee goes stale quickly and is rarely ground to the right size for your dripper. Grinding fresh just before brewing gives a noticeably cleaner, sweeter cup.
Conclusion
Choose a fresh, light to medium-light roast, grind to a medium-fine size and brew at about 1:16 with water near 200–205°F. Keep your steps consistent and change one variable at a time. Small adjustments to grind and pour rate will quickly show you what your beans can do.
Related reading
- Pour Over Iced Coffee: A Step-by-Step Guide to a Bright, Clean Cup
- Pour Over Coffee Water Temp: The Right Range and How to Dial It In
- Pour Over Coffee Hario: A Step-by-Step Guide to a Clean, Balanced Cup
Ready to choose one?
About Miles Sinclair
Miles Sinclair is part of our editorial team and reviews and edits our coffee beans & brewing methods guides, checking product details against manufacturer specifications and owner feedback.