 By Audrey Hayes
Updated November 2026
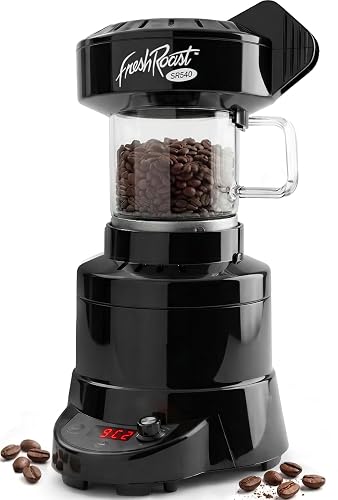
A fresh roast SR800 coffee roaster is a compact, air-powered machine that lets you roast green beans at home in about 10 to 15 minutes per batch. This guide walks you through preparing the roaster, running a basic roast, and reading the signs that tell you when to stop. By the end, you should be able to produce a consistent light-to-medium roast and know where to adjust for darker or brighter results.
Prepare the Roaster and Your Beans
Start with clean equipment and a stable setup. Chaff from previous roasts can scorch and add ashy flavors, so clear the chaff collector and the roasting chamber before each session. Place the roaster on a heat-resistant surface with clear space above it, because the exhaust vents a lot of smoke and chaff.
Shopping for one? See our guide: 7 Best Fresh Roast Coffee Beans of 2026: Our Picks Compared.
Weigh your green beans before you load them. The SR800 is generally used with batches in the range of about 90 to 120 grams of green coffee, and most owners find that staying near the middle of that range gives the most even results. Smaller or larger batches shift the timing, so keep your batch size consistent while you learn.
Run a Basic Roast Step by Step
- Set the roaster to its preheat or start position and let the heating element and fan come up to temperature.
- Load the weighed green beans into the chamber and start the timer as soon as they begin to move.
- Watch the bean color through the chamber and listen closely. Most beans turn from green to yellow, then to tan, over the first few minutes.
- Listen for first crack, a series of popping sounds that usually begins somewhere around the 6- to 8-minute mark depending on bean density and batch size.
- Decide your stopping point. Stopping shortly after first crack starts produces a light to light-medium roast with bright acidity. Waiting until the cracking slows and the beans look darker yields a medium roast with more body.
- Cool the beans immediately. Hot beans keep roasting from residual heat, so move them out of the chamber and cool them quickly with the cooling cycle or a colander and a fan.
Adjust the Roast Profile for Flavor
Your first roasts are a learning tool, so change one variable at a time. Batch size, charge temperature, and total roast time all affect development, and changing several at once makes results hard to interpret.
Use this quick reference to guide your adjustments:
| Goal | What to change | What to expect |
|---|---|---|
| Brighter, more acidic cup | Stop 30 to 60 seconds after first crack begins | Lighter color, floral or fruity notes |
| Balanced medium roast | Stop once cracking is steady and the bean is tan-brown | Sweeter flavor, moderate body |
| Bolder, darker cup | Extend roast into the second crack range | Oily surface, smoky and bittersweet notes |
Keep notes on each roast, including batch weight, time to first crack, and final time. Over several sessions, these records will show you exactly how your beans respond.
Rest and Store Your Roasted Beans
Freshly roasted coffee releases carbon dioxide, and brewing it immediately often tastes sour or flat. Most roasters let beans rest for at least 12 to 24 hours before brewing, though many coffees taste best after a few days. Store the rested beans in an airtight container away from heat, light, and moisture. For longer-term tips, see How to Store Coffee Beans So They Stay Fresh.
Common Mistakes
- Loading batches that are too large or too small for the roaster, which throws off timing.
- Skipping the chaff cleanup, which can cause smoky or ashy flavors in later roasts.
- Judging color alone. Listen for first crack, since color varies with bean origin and density.
- Brewing immediately after roasting. Give beans time to degas before you judge the flavor.
- Changing several variables in one session, which makes it impossible to tell what caused a result.
Recommended Gear
- Digital kitchen scale: Accurate weighing of green beans keeps your batch size consistent from roast to roast. View on Amazon
- Airtight coffee storage canister: Protects roasted beans from air and moisture during the rest period. View on Amazon
- Stainless steel cooling colander: Helps you cool beans quickly after the roast ends, which stops residual heat from pushing them darker. View on Amazon
FAQ
How long does a typical SR800 roast take?
Most roasts finish in roughly 10 to 15 minutes, with first crack usually starting around the 6- to 8-minute mark. Exact timing depends on batch size, bean density, and the roast level you want.
How do I know when first crack has started?
First crack sounds like popcorn popping or rice crispies snapping, and it becomes steady and noticeable after the first few pops. Listening for it is more reliable than watching color alone.
Should I brew my beans the day I roast them?
It is usually better to wait. Resting beans for at least 12 to 24 hours lets excess carbon dioxide escape, which generally improves flavor clarity and sweetness.
Conclusion
With a consistent batch size, a clear method for listening to first crack, and careful notes, the SR800 can produce reliable home roasts within a few sessions. Change one variable at a time, let your beans rest before brewing, and use your records to refine each roast. Your palate will guide the rest.
Related reading
- French Roast Coffee Roaster: 5 Best Home Roasters for Bold Cups in 2026
- 6 Best Small Batch Roast Coffee Picks for Fresh, Flavorful Cups
- Why Are Dark Roast Coffee Beans Oily? Causes and Fixes
- Starbucks Pike Roast Coffee: 7 Best Picks for Every Brewer (2026)
Ready to choose one?
About Audrey Hayes
Audrey Hayes is part of our editorial team and reviews and edits our coffee beans & brewing methods guides, checking product details against manufacturer specifications and owner feedback.