As an Amazon Associate we earn from qualifying purchases. This page may contain affiliate links.
A creamy cold brew recipe comes down to three things: a coarse grind steeped slowly in cold water, a concentrate you dilute to taste, and a rich dairy or non-dairy addition that softens the bitterness. Follow the steps below and you’ll end up with a smooth, low-acid glass of coffee that tastes like it came from a café, using equipment most home kitchens already have. The process takes about 15 minutes of hands-on work plus a long, mostly unattended steep.
Cold brew is forgiving in some ways and unforgiving in others. Because cold water extracts coffee more slowly than hot water, you have more room to adjust strength, but small mistakes in grind size or filtering show up quickly in the cup as sludge or sourness. This guide covers the gear, the base recipe, the cream options, the ratios you can adjust, and the mistakes that most often ruin a batch.
What You Need for a Creamy Cold Brew Recipe
You don’t need specialty equipment to get started, though a few items make the process cleaner and more repeatable. Here is a practical checklist:
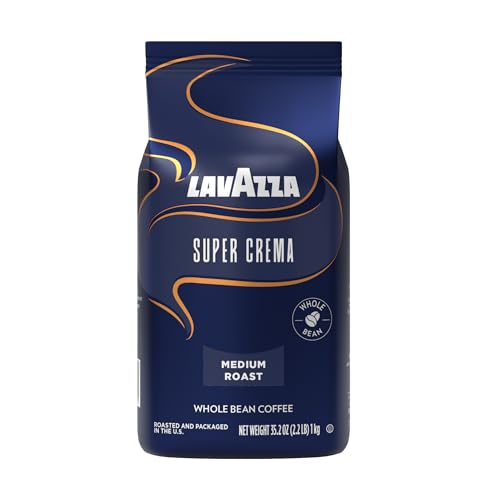
- Whole coffee beans, roasted within the last few weeks, or pre-ground coffee labeled for cold brew or coarse brewing
- A burr grinder that can produce a coarse setting (a blade grinder makes uneven particles that over-extract and muddy the brew)
- A large glass or food-safe plastic container with a lid, roughly 1 to 2 quarts of capacity
- A fine-mesh strainer, a paper filter, or a reusable cold brew filter bag
- A kitchen scale that reads in grams
- Filtered or good-tasting cold water
- A jar and a handheld milk frother for the cream topping, if you want foam
- Your choice of dairy or non-dairy cream, plus a sweetener such as simple syrup or vanilla syrup, if you like
A scale matters more than most people expect. Volume measurements such as scoops vary a lot depending on how the coffee is ground and packed, so weighing both coffee and water gives you a recipe you can repeat exactly.
Step-by-Step: Brewing the Cold Brew Base
The base is the concentrate. Make it first, then worry about the cream. The steps below produce a strong concentrate that you will dilute later, which is the approach most home brewers use for a creamy cold brew recipe.
Step 1: Grind coarse
Set your grinder to a coarse setting, close to the texture of rough sea salt or coarse breadcrumbs. Fine grounds pass through filters, extract too quickly in long steeps, and leave a gritty, bitter cup. If you’re unsure where to start, our guide to Coffee Grind Size by Brew Method: A Practical Chart lays out typical settings, though you should expect to fine-tune on your own grinder.
Step 2: Weigh and combine
For a concentrate, a 1:5 ratio by weight is a reliable starting point. That means 200 grams of water for every 40 grams of coffee. You can go up to 1:8 if you plan to dilute heavily, or down to around 1:4 if you want a stronger base for milk-heavy drinks. Add the coffee to your container first, then pour in the cold water and stir gently so every grind is wet. Avoid stirring vigorously; you want the grounds to soak, not break apart.
Step 3: Steep in the refrigerator
Cover the container and place it in the refrigerator. Steep for 12 to 18 hours. Most home brewers find that around 14 hours gives a balanced result, but the right time depends on your grind, your beans, and your taste. Brewing at room temperature speeds extraction and raises the risk of sourness or spoilage, so refrigeration is the safer default for a batch you plan to keep.
Step 4: Filter thoroughly
Strain the concentrate into a clean vessel. You can use a paper filter set over a funnel, a reusable filter bag, or a fine-mesh strainer lined with cheesecloth. Filtering once is often not enough. Many people find that a second pass through a clean filter removes the fine sediment that makes cold brew look cloudy and taste chalky. Expect the first pass to take a few minutes if you’re using paper, so be patient and don’t press the grounds.
Once filtered, store the concentrate in a sealed glass container in the refrigerator. Many home brewers keep concentrate for about a week or two, though flavor fades over time, so smaller batches are a good idea if you drink it slowly.
Building the Creamy Part of the Recipe
This is where the creamy cold brew recipe earns its name. Cold concentrate is intense, and a rich addition balances its sharper edges. You have several routes, and each one changes the final texture and flavor.
Choosing a dairy or non-dairy base
Whole milk gives a soft, rounded body without much extra weight. Half-and-half sits in the middle, adding enough richness to feel creamy while staying pourable. Heavy cream is the most indulgent and works best when you use it in small amounts or whip it into a topping. Oat milk, particularly barista-style versions formulated to hold up to cold coffee, is a popular non-dairy choice because its natural sweetness and body pair well with cold brew. Almond and soy milks also work, but check the label for thickeners and stabilizers if you want a silky mouthfeel.
Making a sweet cream topping
For a café-style finish, make a sweet cream cold foam. Combine about 1/3 cup cold heavy cream with 1 tablespoon of vanilla syrup or a similar simple syrup in a jar. Froth with a handheld frother for 20 to 30 seconds until it thickens and mounds slightly but still pours. Spoon the foam gently over the top of your drink so it floats rather than sinks. Sweet cream foam keeps reasonably well in the refrigerator for a day, though it will deflate gradually.
Adding sweetness and flavor
Sweeten the concentrate rather than the glass whenever you can. Simple syrup dissolves easily in cold liquid, while granulated sugar may sit at the bottom. For a basic syrup, heat equal parts sugar and water until the sugar dissolves, then cool. Vanilla syrup, a pinch of cinnamon, or a small amount of cocoa can add depth without overpowering the coffee.
Dilution and Ratio Guide
Concentrate is not drinkable as is for most people, and the right final strength depends on your taste and whether you add milk. The table below shows common starting points. Treat them as a place to begin and adjust by one or two steps at a time.
| Drink style | Concentrate | Water or ice | Cream or milk | Notes |
|---|---|---|---|---|
| Classic black cold brew | 1 part | 1 part water, plus ice | None | Good for tasting the beans |
| Creamy iced cold brew | 1 part | 1 part water, plus ice | 1/4 part milk or half-and-half | Balanced starting point |
| Rich cold brew with sweet foam | 1 part | 1 part water, plus ice | 2 tablespoons milk, sweet cream foam on top | Best for a dessert-style drink |
| Strong milk-forward drink | 1 part | Little or no water | 1/2 part milk | Use a 1:4 concentrate for this style |
Build the drink in the glass in this order: ice first, then concentrate and water, then milk or syrup, and finally foam. Stir gently after adding the milk so it blends without losing the layer of foam on top.
Common Mistakes and Tips
Most failed batches trace back to a handful of errors. These are the ones worth watching for.
- Grinding too fine. Fine particles over-extract over a long steep and pass through filters, producing bitterness and sediment. Move your grinder to a coarser setting before changing anything else.
- Steeping at room temperature. A few hours on the counter may seem convenient, but it increases the chance of sour or off flavors. Keep the batch cold.
- Skipping the scale. Scoops are inconsistent. A weighed recipe lets you change one variable at a time and know what caused the difference.
- Pressing the grounds. Squeezing a filter bag forces fine particles through and adds bitterness. Let gravity do the work.
- Adding cold cream to a warm glass. Melted ice dilutes the drink, so pour over plenty of ice and add cream just before serving.
- Diluting too early. Keep concentrate separate from water until you’re ready to drink it. This extends the life of the batch and lets you adjust strength per glass.
- Using stale beans. Coffee that has been open for months tastes flat in cold brew, and cold water does not hide that. Buy smaller bags and grind just before steeping when you can.
If your cold brew tastes sour, try a finer grind, a longer steep, or a fresher bean. If it tastes harsh or woody, shorten the steep or move to a coarser grind. Adjust one variable at a time, and write down what you changed. For broader brewing adjustments that also apply to cold brew, see How to Brew Better Coffee at Home: Ratio, Water, Taste.
Recommended Gear
These items make the process easier and more consistent. You don’t need all of them, but each one addresses a common pain point.
- A glass cold brew pitcher or jar with a lid. Glass doesn’t absorb odors the way some plastics do, and a wide opening makes it easy to stir and pour. Check price on Amazon
- Reusable cold brew filter bags. A fine-mesh bag makes filtering quicker than cheesecloth, though a second pass through paper can still clear up sediment. Check price on Amazon
- A burr grinder with a coarse setting. Consistent particle size is the single biggest factor in a clean, sediment-free concentrate. Check price on Amazon
- A handheld milk frother. It whips cream into a light foam in under a minute and costs far less than a dedicated machine. Check price on Amazon
If you’re deciding between a dedicated cold brew maker and a DIY jar, our review of Best Cold Brew Makers for Home: 3 Cold Brew Makers Compared covers the tradeoffs in detail.
Frequently Asked Questions About Creamy Cold Brew Recipe Results
How long should I steep a creamy cold brew recipe?
Most home batches steep for 12 to 18 hours in the refrigerator. Start around 14 hours and adjust based on taste. Shorter steeps are brighter and lighter, while longer ones taste heavier and more chocolatey.
Can I use regular ground coffee instead of coarse grounds?
You can, but medium or fine grounds often over-extract over a long steep and create a bitter, cloudy result. If you’re using pre-ground coffee, look for a package labeled for cold brew or coarse brewing.
How long does cold brew concentrate last in the refrigerator?
Many home brewers keep concentrate for about one to two weeks when it is sealed and stored cold. Flavor declines over time, so brewing smaller batches is a good idea if you drink it slowly. Dairy additions should be stored separately and used within their own shelf life.
Why does my cold brew look cloudy?
Cloudiness usually means fine particles made it through the filter. Try a coarser grind, filter a second time through a clean paper filter or fine cloth, and avoid pressing the grounds. Some natural haze is normal, but heavy sediment points to filtering or grind issues.
Because cold brew is often consumed daily, it’s worth keeping caffeine intake in mind. Concentrate can be quite strong, and if you have concerns about caffeine, dairy, or any health condition, consult a healthcare professional before making it a regular habit.