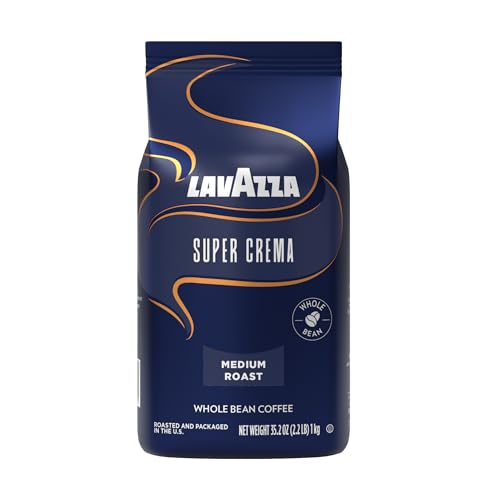
As an Amazon Associate we earn from qualifying purchases. This page may contain affiliate links.
Cold brew is one of the easiest coffee drinks to make well, and once you understand the basic ratio and steep time, you can repeat it every time. In this guide, you’ll learn how to make cold brew concentrate or ready-to-drink coffee at home using coarse grounds, cold water, and a long, unheated steep. The process takes about 15 minutes of hands-on work and a night of waiting.
Cold brew is not the same as iced coffee. Hot coffee poured over ice tastes sharp and sometimes bitter because heat pulls out acids and certain compounds quickly. Cold brew extracts more slowly and gently, which usually gives a smoother, rounder cup with lower perceived acidity. The steps below focus on getting that smooth result without a muddy or flat batch.
What You Need Before You Start
You don’t need specialty equipment to make cold brew, but a few tools make the job cleaner and more consistent. Here’s the basic kit:
- Coffee beans, ideally roasted within the last few weeks. Medium or medium-dark roasts are a common starting point because they tend to taste chocolatey and balanced when steeped cold.
- A burr grinder, so you can set a consistently coarse grind. Blade grinders produce a mix of boulders and dust, and that uneven mix is hard to control.
- A kitchen scale, because weighing coffee and water is far more repeatable than using scoops.
- A large jar, pitcher, or cold brew maker with a container big enough for your full batch plus room for the grounds to swell.
- A filter, such as a fine-mesh strainer lined with cheesecloth, a paper filter, or a built-in filter from a cold brew system.
- Clean, filtered water at room temperature or cold from the tap or fridge.
Step 1: Choose Your Ratio
The ratio of coffee to water controls strength. Most home brewers work in weight, not volume, because grounds vary in density. A common starting point for concentrate is 1 part coffee to 4 or 5 parts water by weight. You then dilute the concentrate after brewing. If you want a ready-to-drink cup straight from the steep, use a weaker ratio such as 1 to 8.
| Goal | Coffee (grams) | Water (grams) | Typical use |
|---|---|---|---|
| Concentrate (1:4) | 100 | 400 | Dilute 1:1 or 1:2 with water, milk, or ice |
| Concentrate (1:5) | 100 | 500 | Dilute 1:1 for a balanced cup |
| Ready-to-drink (1:8) | 100 | 800 | Drink straight or with ice, no dilution |
Start with 1:5 if you’re unsure. It’s forgiving, and you can adjust next time based on how strong the concentrate tastes after dilution.
Step 2: Grind Coarse and Consistent
Grind size matters more in cold brew than many people expect. A finer grind exposes more surface area, which speeds extraction and can push a batch into bitter or cloudy territory, especially with a long steep. For most methods, aim for a coarse grind similar to coarse sea salt or breadcrumbs. If you’re working from a reference, the grind guidance in Coffee Grind Size by Brew Method: A Practical Chart can help you place cold brew relative to other methods.
Grind only what you need right before you brew. Pre-ground coffee loses aroma faster, and a long steep can make stale notes more obvious. If you’re buying beans, a bag’s roast date and storage guidance will help you choose well. For more on reading labels, see Buying Coffee Beans: How to Read a Coffee Bag.
Why a Burr Grinder Works Better
A blade grinder chops beans unevenly. You get some fine powder mixed with larger pieces. The fines over-extract quickly and can make the cup silty, while the larger pieces may stay underdeveloped. A burr grinder crushes beans between two surfaces at a set distance, producing a far more uniform particle size. If you’re using a blade grinder, shake it in short bursts and check the result. The article Blade Coffee Grinders: How to Get a More Even Grind covers how to get the best results from one.
Step 3: Combine Grounds and Water
Add the grounds to your container first, then pour in the cold water. Using cold or room-temperature water avoids the heat that would turn this into a hot brew. Stir gently right after adding the water so that all the grounds are saturated. Dry clumps that float on the surface can extract unevenly, so give the mixture a few stirs or a light press with a spoon.
If your system uses a filter basket or a bag, place the grounds inside it and lower it into the water. Make sure the grounds are fully submerged before you cover the container.
Step 4: Steep for 12 to 18 Hours
Cover the container and let it steep. Most home recipes land between 12 and 18 hours. Steeping at room temperature extracts faster than steeping in the refrigerator, so the time and location work together.
Room Temperature or Refrigerator?
- Room temperature (about 12 hours): Extracts faster and can taste fuller. It’s also a little more prone to developing sour or off notes if you leave it too long, so keep an eye on timing.
- Refrigerator (about 18 to 24 hours): Extracts more slowly and tends to produce a clean, gentle cup. It’s a good default if you want a longer window that’s less sensitive to timing.
If you’re steeping on the counter, keep the container out of direct sunlight, which can warm the mixture and add unwanted flavors.
Step 5: Strain and Filter
When the steep is done, strain the concentrate. This is where clarity improves. A single pass through a coarse strainer removes large particles, but fine sediment will remain. For a smoother, cleaner cup, filter a second time through a paper filter or a cloth-lined sieve. The slower the filter, the clearer the result. Pour slowly and let gravity do the work. Squeezing the grounds can push fine particles into the liquid and add bitterness.
Step 6: Dilute and Serve
Taste the concentrate before you serve it. Dilute it to your preference:
- Mix one part concentrate with one part cold water as a starting point.
- Pour over ice, or chill the concentrate and serve it cold.
- Add milk, cream, or a plant-based alternative if you like. Concentrate blends easily with dairy because the flavor is already bold.
- Adjust the dilution next time. If it tastes too strong, add more water. If it tastes thin, use less water or a higher ratio of coffee.
Once refrigerated, cold brew concentrate typically keeps for about one to two weeks. Store it in a sealed container and trust your senses. If it smells sour, stale, or off, discard it.
Cold Brew Troubleshooting: Fixing Common Problems
Most cold brew problems come down to grind size, steep time, or dilution. Use this quick reference to diagnose a batch:
| Problem | Likely cause | What to try |
|---|---|---|
| Bitter or harsh | Grind too fine or steep too long | Coarsen the grind and shorten steep by 2 to 4 hours |
| Weak or watery | Too little coffee or steep too short | Increase coffee to 1:4, or steep longer |
| Cloudy or silty | Fines in the grounds or single-pass filtering | Filter twice and use a finer mesh or paper |
| Sour or flat | Under-extracted or stale beans | Use fresher coffee and steep a bit longer |
| Muddy with grounds | Dirty filter or squeezed grounds | Replace the filter and avoid pressing the grounds |
Common Mistakes to Avoid
- Using hot water. It defeats the purpose. Cold brew relies on time, not heat.
- Grinding too fine. A fine grind is the most common reason for bitter, cloudy results.
- Skipping the scale. Scoops vary widely, so your ratio will drift from batch to batch.
- Steeping too long at room temperature. Extended counter steeps can turn sour or overly sharp.
- Drinking it straight from the strainer. Single-pass filtering leaves sediment that makes the cup gritty.
- Using stale beans. Long steeps highlight flavor faults, so fresh coffee matters more here than in a quick brew.
- Pressing the grounds. Squeezing the filter pushes bitter, fine particles into your concentrate.
Tips for Better Cold Brew Every Time
- Batch your steep on a schedule. Start it in the evening and strain it the next morning for consistent timing.
- Keep a simple log with grams of coffee, grams of water, steep time, and tasting notes. Small changes add up quickly.
- Experiment with origin. Brazilian coffees often taste nutty and chocolatey in cold brew, while many Central American coffees can taste bright and fruity. For background on how growing regions shape flavor, read Coffee Origins: How Growing Regions Shape Flavor.
- Try a hot pour-over alongside your cold brew to compare. Understanding how extraction changes with temperature will improve both methods. The guide How to Make Better Drip Coffee at Home is a useful companion.
- If you want a broader look at ratios and water across methods, How to Brew Better Coffee at Home: Ratio, Water, Taste covers the fundamentals.
- Store whole beans in an airtight container away from heat and light, as described in How to Store Coffee Beans So They Stay Fresh.
Recommended Gear
These items help with the consistency and clarity that make cold brew worth the wait.
- Burr grinder: A burr grinder gives you the even, coarse grind that cold brew depends on, and it’s easier to dial in than a blade model. Check price on Amazon
- Digital kitchen scale: Weighing coffee and water in grams makes each batch repeatable, so you can change one variable at a time. Check price on Amazon
- Cold brew pitcher with filter: A purpose-built pitcher with a built-in filter simplifies steeping and straining into one container. Check price on Amazon
- Paper coffee filters or cheesecloth: A second, slower filtration pass removes fine sediment and produces a cleaner cup. Check price on Amazon
If you’re deciding between purpose-built systems, Best Cold Brew Makers for Home: 3 Cold Brew Makers Compared walks through the differences in design and workflow.
FAQ
How long does cold brew take to make?
Plan on 12 to 18 hours of steeping. The hands-on time is usually about 15 minutes, including measuring, grinding, combining, and straining.
Can I make cold brew without a scale?
Yes, but it’s less consistent. A common volume guide is about one cup of coarse grounds to four cups of water for concentrate, but grounds vary in density, so weighing gives you far more control.
Why does my cold brew taste sour?
Sourness usually means under-extraction, stale beans, or a steep left out too long at room temperature. Try fresher coffee, a slightly longer steep, or refrigerating the batch during steeping.
Is cold brew stronger than iced coffee?
It depends on the ratio. Concentrate is usually stronger than hot-brewed coffee poured over ice, but once you dilute it, the strength can be similar. The taste is smoother and less acidic in most cases.
How long does cold brew concentrate last in the fridge?
Refrigerated concentrate typically keeps for about one to two weeks in a sealed container. Discard it if it smells sour, stale, or off.